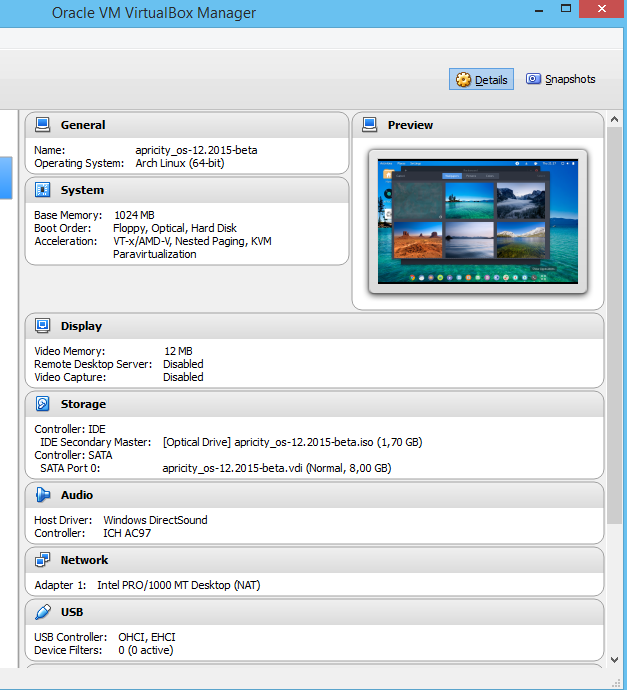


Apricity OS uses the Pamac graphical package manager, PushBullet, Syncthing, the ICE SSB manager, and a modified GNOME environment. It may be downloaded as a live image, and can be installed graphically.

Welcome to Apricity OS, a modern, intuitive operating system for the cloud generation of computing. We believe that an operating system should be easy to use, easily accessible, and beautifully designed. We have also incorporated software in order to minimize security risk as much as possible.
Today we have the great pleasure of introducing you to a brand-new GNU/Linux distribution, called Apricity OS, which aims to be a modern and intuitive Linux kernel-based, cloud-oriented desktop operating system.
Being based on Arch Linux, Apricity OS is built around the GNOME desktop environment, which has been stripped down to its basics in order to consume as little resources as possible, as well as to lower the boot times to a few seconds. It uses ICE, a simple SSB (Site Specific Browser) manager, to put your favorite Web Apps on the desktop, and TLP, an advanced battery management tool for optimizing battery usage on laptop computers.
Among other unique features of Apricity OS, we can mention Pushbullet, a utility that allows users to send links or files between multiple devices, as well as to receive phone calls, short text messages, or other mobile notifications, Syncthing, a tool that lets you transfer large amounts of data across multiple platforms through a fully encrypted system, and PlayOnLinux, a Wine frontend that lets you use Windows apps and games.
Moreover, Apricity OS comes with SBackup, a fully functional system backup utility that supports compressed and uncompressed backups, scheduled backups, manual backups, remote backups, and split backups, Liquid Prompt, a tool that beautifies the Terminal, making it more informative, HiDPI support, Uncomplicated Firewall (UFW), Pamac package manager, LibreOffice, Steam for Linux, and other popular GNOME apps.
"We believe that an operating system should be easy to use, easily accessible, and beautifully designed. We have also incorporated software in order to minimize security risk as much as possible," was stated on the project's website. "This embodies our vision here at Apricity: we want to help make your workspace, and your playspace, more productive and elegant."
At the moment, a first Beta build of the Apricity OS distro is available for download right now via Softpedia, but only for 64-bit computers. The developers stated that 32-bit machines won't be supported at this time. It's distributed as a Live DVD ISO image that you need to write on either a USB flash drive or a DVD disc. Detailed instructions are provided on the project's website.
We remind those of you who want to take Apricity OS for a test drive that the distribution is not yet finished. A Beta build is a pre-release version, which means that it contains unresolved issues and it is not suitable for deployment on production environments as the only operating system. Below is a video of Apricity OS in action, courtesy of The Linux Homefront.


At the core of the Remix OS for PC is our custom engineered version of Android Lollipop – Remix OS 2.0. Our state of the art operating system is the cornerstone of what we do. With its multitude of productivity oriented features combined with over 1.6 million apps, Remix OS seamlessly merges functionality, ease of use, and beauty in amazing ways to give you an unforgettable Android experience.


| Remix OS | |
| Разработчик | |
|---|---|
| Семейство ОС |
Android
|
| Первый выпуск |
2015
|
| Последняя версия |
2.0
|
| Веб-сайт | |
What you actually need is called Persistence. With persistence, the changes you make are saved. Depending on the tool you use to make, the name varies. In Ubuntu's Startup Disk Creator:
That "Stored in reserved ..." is about persistence. In Unetbootin:
The "Space used to preserve files ..." is about persistence.
Also check out: How to make a persistent live Ubuntu USB with more than 4GB
he current Unix USB Installers (e.g. LinuxPenDrive) create a persistent file on the boot partition together with the other files needed for booting. This boot partition is formatted with FAT32 and because of limitations in FAT32, the maximum size of this file is 4GB. To have more persistent storage, this file can be replaced by a partition. The size of such a partition is only limited by the size of the USB drive.
I used the GParted partition manager to resize the FAT32 partition and make space for a big EXT4 partition for the persistent storage. The persistent file can simply be deleted and at the next boot, the Ubunty system will automatically use the bigger persistent partition. There is one complication, though: you need another Ubuntu system to do this because Ubuntu cannot modify its own active boot partition.
I used a 2nd USB drive with Ubuntu live. For the instructions below I used "32 bit Ubuntu 13.10 desktop" version.
Open a terminal window (Ctrl + Alt + T) and remove the persistent file with the following command (adjust this command if the mount point is different in your case) :
rm -v /media/ubuntu/UUI/casper-rw
Refresh GParted (Ctrl + R) and notice the change in "Used"
Right-click on the partition and select unmount. You will notice that the Mount Point is no longer displayed.
Right-click on the partition and select Resize/Move. Select New size: 1000. This will leave some space to store additional or updated files. Click "Resize/Move". An "unallocated" partion will appear
Now create a new partition for the persistent storage. Select the unallocated partition and right click on New.
Select File system: ext4 and Label: casper-rw and click Add
Shutdown Ubuntu, remove the first USB drive (this USB drive is no longer needed) and reboot from the second USB drive.
Open a terminal (Ctrl + Alt + T) and type the following command:
df . -h
Check that the Avail size matches with the persistent partition size you created...
Have fun with it
Ronald
When creating images from existing ISOs you often need to allocate a number of MB for the image to at least fit the files that are in the ISO. Predicting the exact size of the image is hard, even for a program. In this case you will create an image that is larger than actually needed: the image is much larger than the files on the image are combined.
This post will show how to shrink an existing image to a more optimal size. We will do this on Linux, since all required tools are available there: GParted, fdisk and truncate.
myimage.img in this example)GParted is a great application that can handle partition tables and filesystems quite well. In this tutorial we will use GParted to shrink the filesystem (and its accompaning partition in the partition table).
GParted operates on devices, not simple files like images. This is why we first need to create a device for the image. We do this using the loopback-functionality of Linux.
First we will enable loopback if it wasn't already enabled:
$ sudo modprobe loop
Now we can request a new (free) loopback device:
$ sudo losetup -f
This will return the path to a free loopback device. In this example this is /dev/loop0.
Next we create a device of the image:
$ sudo losetup /dev/loop0 myimage.img
Now we have a device /dev/loop0 that represents myimage.img. We want to access the partitions that are on the image, so we need to ask the kernel to load those too:
$ sudo partprobe /dev/loop0
This should give us the device /dev/loop0p1, which represents the first partition in myimage.img. We do not need this device directly, but GParted requires it.
Next we can load the device using GParted:
$ sudo gparted /dev/loop0
This should show a window similar to the following:
Now notice a few things:
We want to resize this partition so that is fits it content, but not more than that.
Select the partition and click Resize/Move. A window similar to the following will popup:
Drag the right bar to the left as much as possible.
Note that sometimes GParted will need a few MB extra to place some filesystem-related data. You can press the up-arrow at theNew size-box a few times to do so. For example, I pressed it 10 times (=10MiB) for FAT32 to work. For NTFS you might not need to at all.
Finally press Resize/Move. You will return to the GParted window. This time it will look similar to the following:
Notice that there is a part of the disk unallocated. This part of the disk will not be used by the partition, so we can shave this part off of the image later. GParted is a tool for disks, so it doesn't shrink images, only partitions, we have to do the shrinking of the image ourselves.
Press Apply in GParted. It will now move files and finally shrink the partition, so it can take a minute or two, most of the time it finishes quickly. Afterwards close GParted.
Now we don't need the loopback-device anymore, so unload it:
$ sudo losetup -d /dev/loop0
Now that we have all the important data at the beginning of the image it is time to shave of that unallocated part. We will first need to know where our partition ends and where the unallocated part begins. We do this using fdisk:
$ fdisk -l myimage.img
Here we will see an output similar to the following:
Disk myimage.img: 6144 MB, 6144000000 bytes, 12000000 sectors
Units = sectors of 1 * 512 = 512 bytes
Sector size (logical/physical): 512 bytes / 512 bytes
I/O size (minimum/optimal): 512 bytes / 512 bytes
Disk identifier: 0x000ea37d

      Device Boot      Start         End      Blocks   Id  System
myimage.img1            2048     9181183     4589568    b  W95 FAT32
Note two things in the output:
End)sectors of 1 * 512)We will use these numbers in the rest of the example. The block-size (512) is often the same, but the ending block (9181183) will differ for you. The numbers mean that the parition ends on byte 9181183*512 of the file. After that byte comes the unallocated-part. Only the first 9181183*512 bytes will be useful for our image.
Next we shrink the image-file to a size that can just contain the partition. For this we will use the truncate command (thanks uggla!). With the truncate command need to supply the size of the file in bytes. The last block was 9181183 and block-numbers start at 0. That means we need (9181183+1)*512 bytes. This is important, else the partition will not fit the image. So now we use truncate with the calculations:
$ truncate --size=$[(9181183+1)*512] myimage.img
Now copy the new image over to your phone, where it should act exactly the same as the old/big image.
======
DriveDroid is an Android application that allows you to boot your PC from ISO/IMG files stored on your phone. This is ideal for trying Linux distributions or always having a rescue-system on the go... without the need to burn different CDs or USB pendrives.
DriveDroid also includes a convenient download menu where you can download USB-images of a number of operating systems from your phone. You can also create USB-images which allows you to have a blank USB-drive where you can store files in. Blank images also allow you to use tools on your PC to burn images to the drive and create a bootable USB disk that way.
If you like DriveDroid, feel free to donate.


